Can I use Pyrex for creme brulee? Yes—if you control the oven temperature and avoid sudden thermal shocks, your glass ramekins will stay crack‑free.
Ever thought about using Pyrex for crème brûlée? Hold on. Before you try, you should know the risks. Using Pyrex for this dessert can lead to disaster.
Glass dishes like Pyrex and Anchor Hocking warn against broiler use. They can break easily, ruining your dessert. Always put safety first when making crème brûlée.
Pyrex can handle up to 450°F. But, crème brûlée needs special cookware for safety and the best taste.
Understanding Crème Brûlée Basics
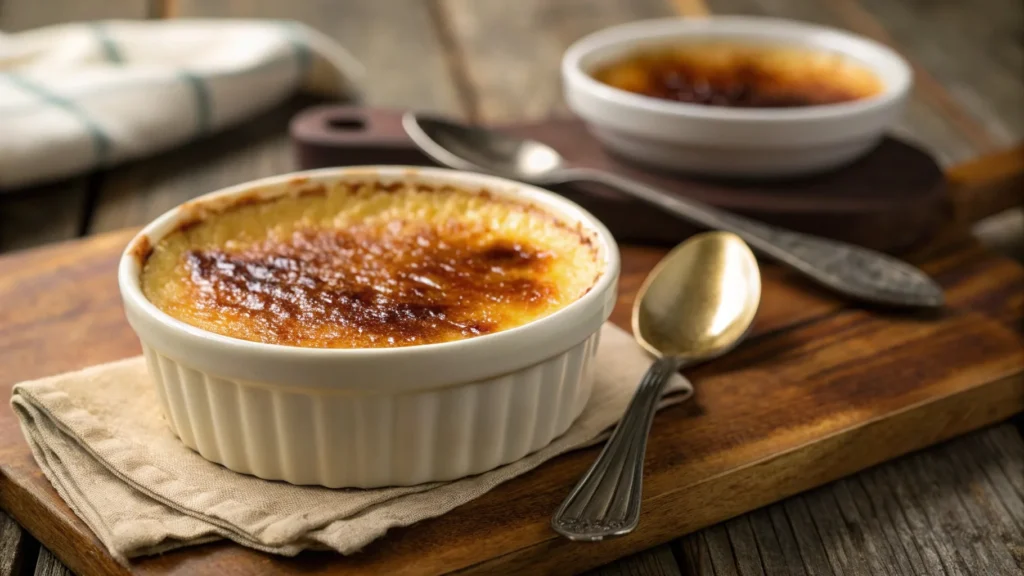
Crème brûlée is a classic French dessert. It has a creamy custard base topped with a crunchy caramelized sugar. To make it, you need to know about its ingredients, cooking tools, and how to control the temperature.
Traditional Recipe Components
A great crème brûlée starts with top-notch ingredients. The basic mix includes heavy cream, egg yolks, sugar, and vanilla. Each part is key to the dessert’s creamy and rich taste.
| Ingredient | Quantity | Purpose |
|---|---|---|
| Heavy Cream | 3 cups | Creates rich, smooth base |
| White Sugar | 3/4 cup | Sweetens custard |
| Egg Yolks | 5 | Provides creamy texture |
| Vanilla | 1 tsp | Adds flavor depth |
The choice between milk and heavy cream significantly affects the texture and flavor of crème brûlée. While heavy cream is the classic choice for a rich and creamy custard, some variations use milk for a lighter version. Want to know which option is best for your recipe? Read our detailed comparison on Milk vs. Heavy Cream in Crème Brûlée to learn more.
Essential Cooking Equipment
Choosing the right cooking tools is vital for crème brûlée. You’ll need ramekins, a deep baking pan, and a kitchen torch. Precision tools make all the difference in achieving a professional-quality dessert.
Crème Brûlée Baking Temperatures: Can Pyrex Handle the Heat?
Temperature control is key in making crème brûlée. Preheat your oven to 325°F (163°C). Bake the custards for 35-45 minutes. They should wobble gently when done. Chill them for at least 2 hours before serving for the best texture and flavor.
For an in-depth look at what makes crème brûlée so special, including expert tips and techniques, check out our detailed guide on What Is the Secret of Crème Brûlée?
Can I Use Pyrex for Crème Brûlée?
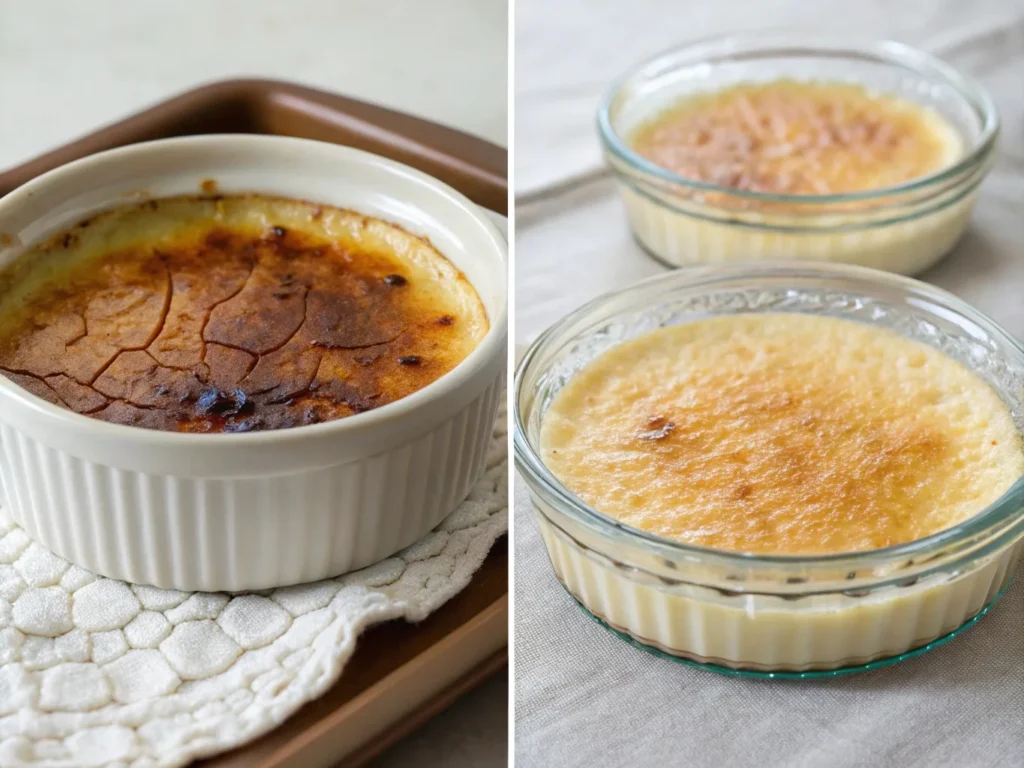
Pyrex safety is key when making crème brûlée. Glass bakeware is versatile, but not all Pyrex is good for high heat. Modern Pyrex, made from tempered soda-lime glass, has limits for direct broiler use.
Heat resistance is vital for crème brûlée bakeware. Your Pyrex might be okay for baking the custard at lower temps. But, caramelizing sugar is a big challenge. Makers warn against direct broiler use due to thermal shock risk.
| Pyrex Characteristic | Impact on Crème Brûlée |
|---|---|
| Temperature Range | 350°F-450°F (Safe for initial baking) |
| Thermal Shock Risk | High when temperature changes exceed 100°F |
| Recommended Baking Temp | 300-315°F for even custard cooking |
To use Pyrex safely, follow these tips: Pick shallow dishes, 1-2 inches deep. Lower the oven by 25°F. Use individual Pyrex bowls for even portions. Always prioritize safety when making delicate desserts like crème brûlée.
For the best results, use ramekins made for high heat. These offer better heat spread and lower thermal shock risk. This keeps your glass bakeware safe.
Best Ramekin Alternatives If You Can’t Use Pyrex for Crème Brûlée
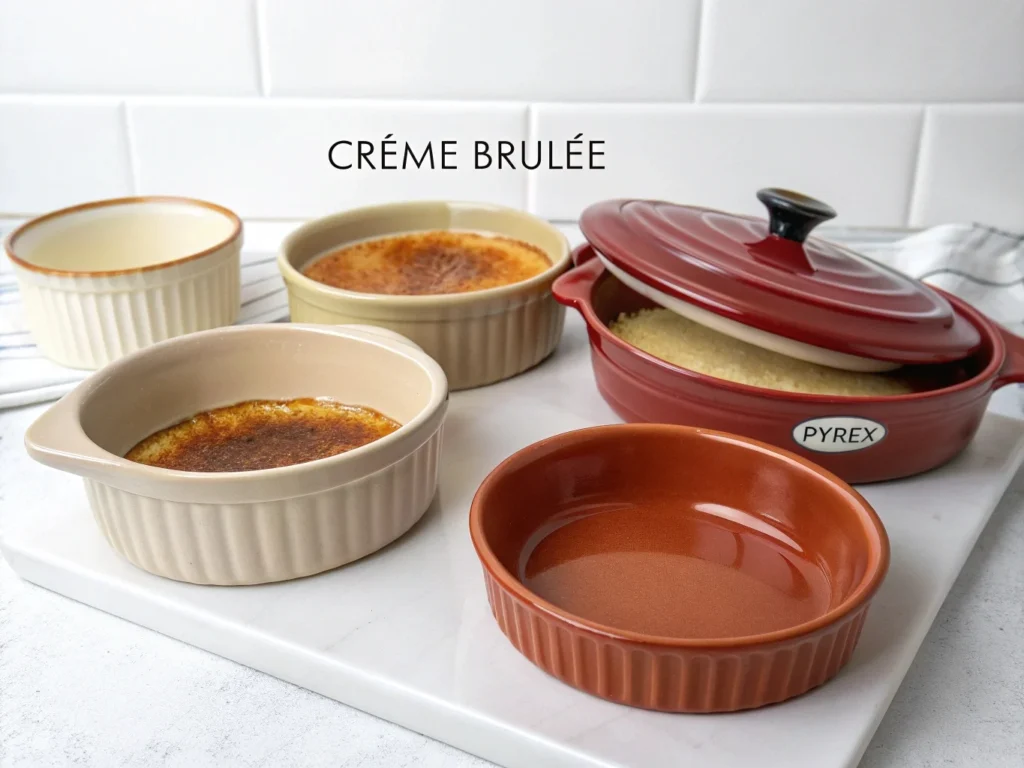
Choosing the right heat-safe dishes is key for stunning crème brûlée. The right cookware can make your dessert unforgettable. Knowing about different ramekin materials helps pick the best one for your dish.
Porcelain Ramekins: The Classic Choice
Porcelain ramekins are the top pick for making crème brûlée. They come in sizes from 4 to 8 ounces, perfect for serving. Thick bone china ramekins can handle temperatures up to 1,400 degrees Fahrenheit, way beyond what most ovens can do.
| Ramekin Brand | Capacity | Temperature Resistance |
|---|---|---|
| Dowan | 4 ounces | High heat resistance |
| Sweese | 7.5 ounces | Oven-safe design |
| Thick Bone China | 8 ounces | Up to 1,400°F |
Enameled Cast Iron: Durability Meets Performance
Enameled cast iron dishes are great for even heat. Though not as common as porcelain, they cook well and can take high broiler heat.
Terracotta Containers: Rustic Elegance
Terracotta adds a rustic touch to your crème brûlée. These clay dishes keep heat well and look authentic. But, terracotta needs careful handling to avoid breaking.
Think about size, heat resistance, and looks when picking ramekins. Your ideal crème brûlée dish is waiting for you!
How to Caramelize Sugar Without Damaging Pyrex in Crème Brûlée
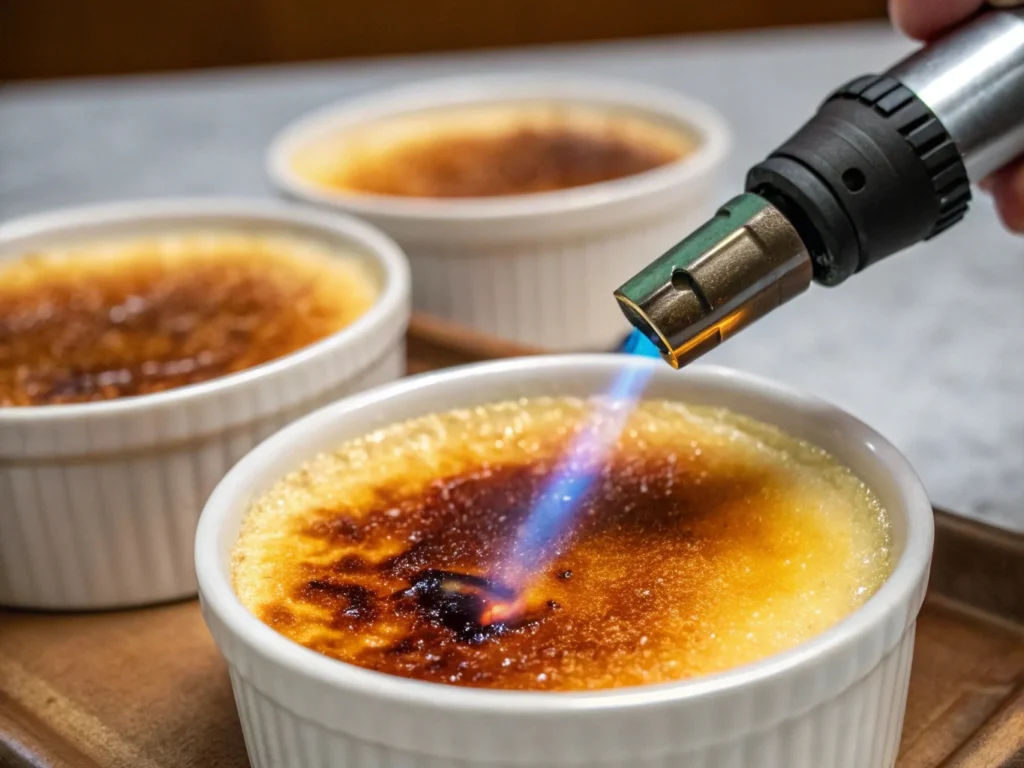
Mastering sugar caramelization is key to a perfect crème brûlée topping. Your caramel crust should be thin, crisp, and golden brown. Start by removing your chilled custard from the fridge about 10 minutes before caramelizing. This brings it to room temperature.
The sugar topping needs careful attention. Sprinkle a thin, even layer of granulated sugar over the custard. You’ll need about 50g of sugar for four servings. Use a fine-mesh sifter to spread the sugar evenly, ensuring consistent caramelization.
When making your caramel crust, you can use a kitchen torch or a broiler. A kitchen torch gives you more control and even caramelization. Hold the torch 2-3 inches from the sugar, moving in circles to avoid burning.
| Caramelization Method | Pros | Cons |
|---|---|---|
| Kitchen Torch | Precise control | Requires special equipment |
| Broiler Method | No additional tools needed | Less uniform caramelization |
Watch for the sugar to melt and turn deep amber. The perfect caramel crust hardens in a few minutes after caramelizing. Let the dessert rest for 5 minutes before serving. This allows the sugar to cool and creates a crisp shell.
Kitchen Torch vs. Broiler Method
Getting the caramelized sugar topping right on crème brûlée is key. The choice between a kitchen torch and broiler method greatly affects your dessert’s look and taste.
Benefits of Using a Kitchen Torch
A kitchen torch gives you unmatched precision for caramelizing. You can control the sugar’s caramelization with great accuracy. This creates a golden, glossy layer that shatters beautifully when tapped.
The torch method ensures an even caramel surface. It avoids overcooking the custard underneath.
Limitations of the Broiler Method
The broiler method has its own set of challenges. It can lead to uneven caramelization, with some spots burning and others pale. The custard might get too warm, ruining its silky texture.
Getting the perfect caramelized top is harder with the broiler method. It lacks the precise control needed.
Torch Selection Guide
When picking a kitchen torch, keep these points in mind:
- Fuel Type: Butane torches are compact and kitchen-friendly
- Flame Intensity: Adjustable settings provide more control
- Safety Features: Look for models with automatic shut-off
Pro tip: A propane torch from a hardware store can be more powerful. It’s great for making multiple ramekins of crème brûlée.
Step-by-Step Crème Brûlée Preparation
Making the perfect crème brûlée needs precision and careful preparation. You’ll need a few key ingredients for this classic dessert. Start by gathering: 3 cups heavy cream, 1 vanilla bean, 5 egg yolks, and superfine sugar.
First, split the vanilla bean lengthwise and scrape out the seeds. Heat the cream with the vanilla bean seeds in a saucepan until it simmers gently. Then, remove it from heat and let it infuse for 15 minutes.
Next, whisk the egg yolks with ½ cup superfine sugar until they’re pale and creamy. Slowly add the warm cream, stirring constantly to avoid scrambling. Strain the custard to get a silky texture.
| Ingredient | Quantity | Purpose |
|---|---|---|
| Heavy Cream | 3 cups | Base of custard |
| Egg Yolks | 5 | Thickening agent |
| Superfine Sugar | 1 cup | Sweetening |
| Vanilla Bean | 1 | Flavor enhancement |
Pour the mixture into ramekins in a deep baking dish. Make a water bath by adding hot water ⅔ up the sides of the ramekins. Bake at 325°F for 35-40 minutes until set but slightly jiggly.
Let the crème brûlée cool for 1 hour at room temperature. Then, refrigerate for at least 4 hours or overnight. Before serving, sprinkle 1 tablespoon of sanding sugar on top and caramelize with a kitchen torch until golden brown.
FAQ
Can You Use Glass for Crème Brûlée?
Yes, but not all glass is suitable. Regular glass bakeware, including Pyrex, can crack under high heat, especially under a broiler. If using glass, choose tempered, oven-safe glass that can handle gradual temperature changes.
What Can I Use Instead of Ramekins for Crème Brûlée?
If you don’t have ramekins, you can use small ceramic or enameled cast iron dishes. Shallow oven-safe bowls or terracotta dishes also work well. Just make sure they distribute heat evenly for proper baking.
Can You Bake in Pyrex Glass Ramekins?
Yes, Pyrex glass ramekins can handle baking at lower temperatures, typically up to 450°F. However, they are not ideal for caramelizing the sugar topping under a broiler, as sudden heat exposure may cause them to crack.
Can Pyrex Glass Be Used for Baking?
Pyrex is safe for baking at moderate temperatures but should not be exposed to rapid temperature changes. To prevent cracking, avoid transferring Pyrex directly from the fridge to a hot oven or placing it under a broiler.
Why Are Ceramic Ramekins Better Than Pyrex for Crème Brûlée?
Ceramic ramekins offer better heat distribution, ensuring an evenly baked custard. They can also withstand the high heat needed for caramelizing the sugar topping without the risk of cracking, making them the preferred choice for crème brûlée.
Conclusion
Making the perfect crème brûlée needs careful thought about cookware and technique. Your success depends on the right tools and knowing their limits. Pyrex might seem easy, but it’s not the best for this French dessert.
Experts say use ceramic ramekins or special baking dishes for even heat and safety. The right cookware can make a big difference in your dessert’s texture and quality. Choose ceramic dishes of 4 to 6 ounces for the best results.
It’s important to cook safely when making this classic dessert. Always follow the maker’s advice for your bakeware. Use a water bath for gentle cooking and a kitchen torch for caramelizing the sugar. Trying different methods will help you create your own special crème brûlée.
Being patient and paying attention to details is essential for a great dessert. With the right approach, you can turn simple ingredients into a fancy, restaurant-quality treat. This will show off your cooking skills.